|
Nowadays, most of the users use the WiFi routers in their home. Through the router setup, you can get good internet speed and can enjoy online streaming, browsing, online movies and videos. The main issue with the router is that its range is restricted and you cannot use the internet connection from some distance. If you are also facing the same problem and the wireless signals are unable to reach the corners of the home or office then go with the wireless repeaters. If you are facing the difficulty in accessing the http//myrepeater.net login page then don’t panic! You have landed in the right spot. In this blog, you will get to know the simple instructions to access http //myrepeater.net webpage for repeater setup. Guidelines for the Wireless-N WiFi Repeater Login Setup If you want to extend the range of your existing wireless network through a web interface then you need to perform the wireless repeater setup through http //myrepeater.net. Before moving further with the configuration of repeater, visit http //myrepeater.net. Here, you will get the step-by-step guidelines for the wireless-n WiFi repeater setup: Step 1: Firstly, make sure that you have placed the wireless repeater closer to the wireless home router. Step 2: After that, check whether the WiFi repeater is switched on or not. Thereafter, you will see that the power LED light turns green. Also, the wireless repeater is connected with the electrical socket. Step 3: Take the Ethernet cable and use it to connect it with your device that you will use for the configuration of the wireless repeater. Step 4: Lunch the internet browser of your choice from your system. Enter http //myrepeater.net in the URL bar of the internet browser. If this web address does not work for you then you can use the IP address 192.168.10.1 for repeater login. Step 5: Now, a login pop-up will display on the screen requesting for entering the default username and password. Step 6: Enter the default username and password for your wireless repeater. The default username and password is “admin”. Step 7: Once you login successfully, you will be reached to the wireless repeater setup dashboard.  Quick Instructions to Change WiFi Repeater Password
Look at the below steps to change the WiFi repeater password through http //myrepeater.net: Step 1: Launch any web browser of your choice from your system. Step 2: Go to the myrepeater.net official website. Step 3: Now, you will see the two boxes where you have to enter the username and password. Step 4: Enter the login credential details carefully for your wireless repeater. Step 5: Tap on the login button to proceed further. Step 6: Next, go to the wireless settings from your wireless repeater webpage. Step 7: Now, you can make changes in the password. Create a unique and strong password by following the on-screen instructions. Congrats! After following the above-mentioned instructions, you can easily set up your wireless repeater through http//myrepeater.net web address. Once you complete the repeater setup, you can easily remove the dead zones from your home or office and can enjoy the high-speed internet connection on your device.
0 Comments
Amped wireless routers dispense long-range coverage and come with dual bands for better connectivity. Amped wireless router is the emperor of long-range, high-power wireless routers. It has advanced technology and a smart security feature. The Amped wireless router has extra wired slots and high-power antennas for better connectivity. But, what makes it a hit is its convenient setup. For setting up your Amped wireless router, you can hop onto setup.ampedwireless.com or http//myrepeater.net. https://myrepeater.net is the official web portal for setting up wifi routers and repeaters. With the help of this blog, we will explain how you can set up Amped wireless router. Easy Instructions For Amped Wireless Router Setup Using Myrepeater - STEP 1. The prime step is to detach your main wifi router from the internet modem and your PC system. STEP 2. Now, get an ethernet wire and link your Amped wireless router to the modem using it. STEP 3. Connect the wire to the WAN slot of the Amped wireless router on one end and the modem on the other end. STEP 4. Now disconnect the power cable from your modem and router for approximately 10 seconds and then turn it off. STEP 5. The next step is to link it back to the power outlet and switch on the modem first. After that, switch on the Amped wireless router. STEP 6. Now, use an ethernet cable to connect your Amped wireless router to the PC system. STEP 7. After that, begin with the login setup by launching a web browser on your device. STEP 8. Here you have to enter myrepeater in the address bar. STEP 9. A login web UI will launch on your screen. But, if you are setting up your device for the first time then, a setup configuration screen will reflect on your screen. STEP 10. Once you click on the begin setup icon, a Smart Setup Wizard will open up on your screen. This will start the procedure automatically. STEP 11. The setup wizard will utilize the on-screen guidelines to guide the user regarding the whole internet connection procedure. STEP 12. Select the Automatic Configuration option to configure your Amped wireless router automatically. Now, press the Next button to proceed ahead. STEP 13. Now, select to provide your Amped wireless network name or SSID. 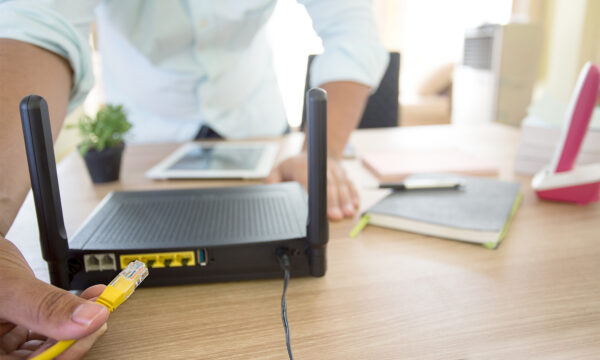 Easy Instructions For Logging Into The Amped Wireless Login Page:
STEP 1. Begin by plugging your device into an electrical wall outlet. STEP 2. Connect your Amped wireless router and PC device using an ethernet wire. STEP 3. Now, open your preferred browser on your device, and in the address slot enter myrepeater then press the enter key to proceed. STEP 4. In case, this web address doesn’t operate, you can try using the default IP address 192.168.1.240 to log in to the settings of the wifi router. STEP 5. The next step on the Amped WIFI setup page is to type ‘admin’ in the username and password slots. STEP 6. Hit the Login icon after that. STEP 7. Now you will observe a set of guidelines on your display, go with that. STEP 8. Finally, you can easily configure your Amped wireless router by going to the web UI. Amped Wireless Router Setup Wrapped Up! So here is everything you need to know about the Amped wireless router setup. To set up amped wireless router you can go to the web interface myrepeater. One such URL that is used for setting up any wifi router or repeater is myrepeater.net. That’s it! Enjoy surfing with the fastest wifi router. Ultimate Guide For The TP-Link Repeater Setup And Installation Via Myrepeater Are you trying to access the TP-Link wifi repeater’s admin settings web page? Well, then you have stepped on the correct site. Tplinkrepeater.net is the official web handle for configuring the wifi repeater settings. In case you are unable to login to the tplinkrepeater web UI then you may jump onto the http//myrepeater.net URL. Myrepeater is the local web address that assists in setting, managing, and changing the settings of any wifi repeater. In this blog, we will help you with the setup and installation of your TP-Link wifi repeater. Nowadays, wifi repeaters have become a necessity for increased internet speed and wide network coverage as they cannot be compromised. So, you need to have a perfect idea of how to set up your wifi repeater. Ultimate Step-By-Step Guide To Setup And Install TP-Link Wifi Repeater: You can set up your TP-Link repeater by following the instructions mentioned on the web UI tplinkrepeater.net or myrepeater.net in two different methods; These are the WPS method and the Web Browser method. Let’s get into the detailed setup process via both methods one by one. Steps To Install And Setup TP-Link Repeater Via WPS Method- STEP 1: To commence the installation, plug in your TP-Link repeater to a power supply wall socket. STEP 2: Then, switch it on. It is the easiest way to install the TP-Link wifi repeater. STEP 3: To start the setup, push the WPS button on your wifi router and then, Within the next two minutes push the WPS button on your TP-Link wifi repeater. STEP 4: See if the blue LED light on the repeater turns solid. This implies that the WPS connection is successful. STEP 6: To connect to frequency bands other than 2.4 GHz and 5 GHz, attempt the first two steps again to connect. STEP 7: That’s it, you can enjoy a higher and stable speed of the internet.  Steps To Install And Setup TP-Link Repeater Via Web Browser-
STEP 1: To install the wifi repeater first, attach the power cord to an electrical socket. STEP 2: Make sure to detach any ethernet cord attached to your computer system. STEP 3: Then click on the wifi icon on the taskbar, connect it to the repeater’s network i.e TP-Link-extender-2.4 GHz-5GHz. STEP 4: On your wireless PC device launch your most used web browser. STEP 5: In the search bar of your web browser enter tplinkrepeater.net, the official URL for tp-link repeater settings. STEP 6: Now, look for the setup login on the tplinkrwepeater.net webpage. STEP 7: Then, click on the setup login tab to the TP-Link wifi repeater window and type in your username and password in their respective fields to log into the settings page for your wifi repeater. STEP 8: Navigate to the settings tab and then tap on the Network option. STEP 9: Choose either 2.4 GHz or 5GHz according to your preference and save the changes by tapping on the Save Tab. STEP 10: Finally, your TP-Link repeater setup is complete via the web browser method. TP-Link Ready To Roll! The setup process mentioned in the above article is designed in easy and crisp steps. You just have to log onto tplinkrepeater.net and make the desired changes. In case you are unable to log into that, try logging into the myrepeater web interface to access the tp-link configuration settings. You can enjoy a higher speed and a stable network just with the easy setup. You know it’s time to get your hands on a wifi range extender if your main wifi network is not available in all areas of your home and is not giving a satisfactory network speed. You can buy an Asus wifi repeater to increase the wifi range at your place. You can set up your Asus wifi repeater via myrepeater.net or via logging onto Myrepeater.net. http//myrepeater.net is a website for setting various wifi repeaters. It provides proper guidelines for the setup procedure of the different wifi repeaters and the Asus wifi repeater is one of them. In this blog, let us see how we can set up the Asus wifi repeater. Easy Guide On Login- Asus wifi repeaters are getting so much acknowledgment in the market for their performance. They dispense such amazing signal strength in the network dead spot areas as well. Let’s see below how we can log in to the Asus wifi repeater via myrepeater.net.
Easy Guide On Setup- To increase the signal strength and improve the network coverage make sure you have an AC adapter, an ethernet cord, and a properly working network connection line to set up the Asus wifi repeater via myrepeater.net.Let’s see the setup manual below;
So, the steps written above help you in completing the setups of your Asus wifi repeater via myrepeater.net. But, you can also set up your Asus wifi repeater with the help of myrepeater.net as this is a website used to set up wifi repeaters. Just log onto myrepeater.net and proceed by entering the login information and other prompts and log into the Asus wifi repeater. Asus Is Ready To Use! Myrepeater.net is the ultimate setup wizard for Asus wifi repeater or say all wifi repeaters. You can set up your wifi repeater in no time. Just log in and you are all set to go. The setup process is not complicated, just make sure you have all three, an AC adapter, an ethernet wire, and a properly working internet connection line to start with the Asus wifi repeater setup. If you get stuck somewhere while the repeater setup process, our team of technical experts is ready to help and just call away. Our toll-free number is mentioned on our website. Some Important Facts About Myrepeater.net Myrepeater.net is your wifi repeater’s ultimate setup guide. You can set up your wifi repeater, make adjustments to the network settings, login settings, and so much more by using this website. In just a few simple steps log into the myrepeater web interface and get to the wifi repeater’s admin panel to make desired adjustments. In this blog, we will discuss some facts about this web address and also explain how to set up your wifi repeater. Facts And Knowledge About Myrepeater.net- Myrepeater.net is a very common and most used website. Know some important facts and knowledge about the myrepeater.net web handle;
 Guide To Set Up Wifi Repeater Via Myrepeater.net-
Before beginning the setup and login guide, note down the username or password of your wifi repeater. Now, follow the steps carefully to proceed further;
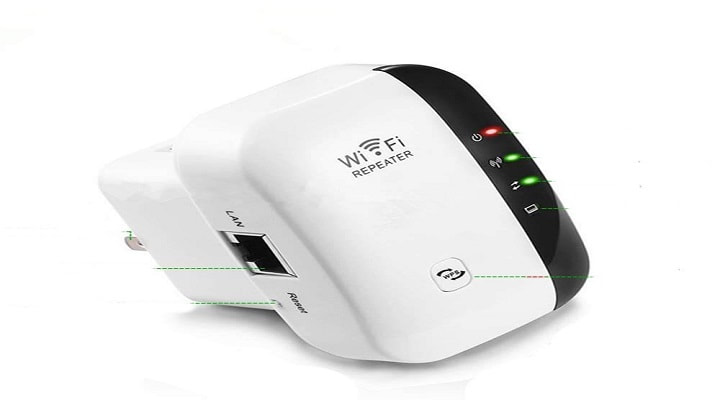
Ultimate Facts About Myrepeater.net Revealed! So here we have discussed some knowledgeable information about myrepeater.net. Hope this blog helps you in setting up your wifi repeater and making the desired configuration settings for your device to have the best internet speed and signal strength. Frustrated with the poor or no WiFi signals? Have an issue with your wireless repeater? Facing trouble in myrepeater configuration? Want to extend the range and connectivity of the wireless signals with myrepeater.net? If the answer to the above questions is yes then you don’t need to be worry! We are here to assist you in the setup and configuration of your wireless repeater. In this blog, we have described the detailed instructions that help you in the setup of the wireless repeater through the myrepeater.net web address. Keep reading the blog till the and check out the simple steps for a repeater setup. Methods for the Wireless Repeater Setup and Configuration There are different methods through which you can easily set up and configure your wireless repeater to your existing wireless network. In this section, we have described the simple instructions for the wireless repeater setup using the manual method and WPS button. If you fail in wireless-n repeater setup through the WPS button then you can use the manual method. Method 1: WiFi Repeater Setup via WPS Button The configuration of the WiFi repeater through the WPS button is the easiest way to connect your repeater device to the existing wireless network without setup any manual connections and logging in. You just need to push the WPS push button. Here are the steps for repeater setup: Step 1: The first step is to unbox your repeater. After that, plug in your device to the electrical outlet nearer to the host wireless router. Step 2: Next, go to the router and press the WPS button located on it for 3-4 seconds. Step 3: Locate the WPS button on your repeater device. You will find it on the front side of your device. Step 4: Within two minutes of pressing the WPS button on your wireless router, you need to press the WPS button on your repeater device for 3-4 seconds. Step 5: Now, you will see that the repeater WiFi LED light will start flashing. Also, the signal light will turn on after establishing a successful connection. Step 6: You need to visit the WiFi connection on your mobile or laptop and then scan for the repeater SSID. Step 7: In the next step, connect your repeater SSID by using the same password as that of your old wireless network. You also need to check the internet whether it starts working with the extended network or not. Step 8: At last, you need to search for a centralized location for your repeater device to get the high connectivity and better performance of the repeater.  myrepeater Method 2: WiFi Repeater Setup Using Manual Method
The WiFi repeater setup through the manual method needs a physical or wireless connection with the repeater device to access its settings. For this, you need to connect the wireless repeater device to the LAN port or default SSID for the configurations. Follow the below steps for the WiFi repeater setup using the manual method: Step 1: Firstly, you need to unbox your repeater device. After that, plug in your device to the power outlet nearer to the home wireless router. Step 2: For establishing the wireless connection, you need to visit the wireless connection and then connect to the “WiFi repeater” or “myrepeater” as shown in the repeater default SSID. Step 3: The wireless connection utilizes the LAN cable to connect to the LAN port of the repeater. Plugin your device to the LAN port of your computer or laptop. Step 4: Next, go to the LAN IP settings of your computer or laptop and ensure that you have selected DHCP. Step 5: Launch any web browser and enter myrepeater.net or 192.168.10.1 IP address to access the repeater login page. Step 6: Use admin as the default username and password. Also, select the country and language. Step 7: You will be redirected to the dashboard where you have to select the repeater mode option. Step 8: Your repeater will start scanning and all the nearby networks are displayed on the screen. Step 9: Choose your host wireless network from the displayed list. Enter the security key to allow the connection from the repeater. Note: The SSID password of the repeater is the same as that of the existing WiFi network. Step 10: Once the setup is completed, reboot your repeater. Step 11: At last, go to the wireless option and then connect the repeater SSID that you have configured. Congrats! By following the above instructions, you can set up your wireless repeater through myrepeater.net without facing any difficulty. In today’s technology-driven era where every household and office has a wifi router network, you will also find a wifi repeater or extender. This is because the world is pacing at such a fast speed and slow internet is one thing no one can afford. So wifi repeaters have taken the lead and become a necessity. With this, myrepeater.net has also become a common name because it is a local website that helps you to set up your wifi repeaters and also log in to their admin dashboard to configure various settings. But, there must be some other alternative for myrepeater in case it has stopped working or you are unable to log into the web interface. Keep going with this blog to get more details. Stepwise Instructions To Do Myrepeater.net Login - Myrepeater.net web address is utilized for managing and controlling the settings of your wifi repeater. For that, you need to log into the repeater dashboard using its default login credentials. To check the login information look at the rear of the wifi repeater, there is a label that has all the login information mentioned on it. Follow the steps to do the myrepeater login and modify the configuration settings of your wifi repeater;
Stepwise Instructions To Use The Alternative Method If Myrepeater.net Doesn’t Work -
Since there are so many wifi repeaters out there and everyone tries to get into the main dashboard to configure the settings, there will be times that you won’t be able to get into the web page. So, there is always an alternative method to get into the admin panel of the repeater. Here we will talk about the default gateway address that takes you into the admin dashboard of the wifi repeater just the same way myrepeater.net takes you. The default IP address for most of the wifi repeaters is 192.168.10.1. But in case it doesn’t work for your repeater, check its manual to know its default IP address and use that to log in;
Alternative Method Saved The Day! Myrepeater.net is just another web address that can stop working or give a hard time logging in. But, when you have the right guide in your hand nothing is as hard as it seems. By following the above-mentioned steps you can use an alternative method to configure your wifi repeater. In case you still come across some issues, or can’t figure out the default IP address of the wifi repeater then contact our technical maestros with the help of the chat support box on our website and get the best help in the least possible time. Are you looking for a solution to myrepeater.net problems? You don’t remember the password, or myrepeater.net is not working. We will cover all that for you. In this blog, we will enlighten you about some common reasons why myrepeater.net is not working, how to launch the page if you don’t remember the login credentials, or factory reset my wifi repeater. Just hook to this page and learn everything. Reason Behind Myrepeater.net Not Working Issue:- There can be some sort of network or connection problem when you come across the myrepeater not working issue. Either there is a fault in the wired connection or the internet is not stable and active. Make sure;
Forgotten Your Wifi Repeater’s Passkey? Imagine trying to access the admin settings and being shut out for not remembering the repeater’s password. In case you have forgotten the wifi repeater’s password Then;
Myrepeater.net Step-By-Step Setup Guide:
Myrepeater.net Issues, Solutions, And Setup Are Covered!
That’s the end of an informative blog that will clear all your doubts and questions related to the myrepeater.net web address. Myrepeater.net or http://myrepeater.net is a local web address that can be used to manage the wifi repeater. You can make or alter the configuration settings of the wifi repeater by logging on to this web page. You can easily configure the network settings, login settings, and so much more from the URL http://myrepeater.net. In this blog, we will discuss how you can use http://myrepeater.net to set up your wireless n wifi repeater via WPS or manual method. Steps To Set Up Wifi Repeater With WPS Method:
Steps To Set Up Wifi Repeater With Manual Method:
That Was http://myrepeater.net For You! What is myrepeater.net? How to use http://myrepeater.net? and many such queries were asked by the wireless n wifi repeater users. Once you go through this blog, you will get answers to all these queries. You can configure your wifi repeater as you want and like. Enjoy extended and enhanced internet connectivity! Myrepeater.net is a URL that acts like a genie for wireless n wifi repeater users. Via this URL you can log into the admin dashboard of your wifi repeater. Once you log into your wifi repeater’s settings, you can manage and modify any changes you want in your repeater. With the help of the myrepeater web interface, you can check the network settings, login settings, firmware updates, and so much more. But, everything can go to a halt if myrepeater web page stops working or responding. There can be several reasons for this. Hook to this blog to know how you can resolve myrepeater not working issue. Some Tips To Resolve ‘Myrepeater Not Working’ Error: In case myrepeater.net is not working or there is some connectivity issue with this URL then follow the tips in the section below and resolve this error;
Easy Steps To Access Myrepeater.net If You Have Forgotten Your Wifi Repeater’s Password: If you change your wifi repeater’s login details and don’t remember them, then the only option is to reset the device to its default factory settings;
Myrepeater.net Issues Sorted!
Myrepeater.net acts as a setup wizard for your wireless n wifi repeater. But, sometimes even wizards break down and stop working. So when you see that myrepeater.net is not accessible and has stopped working then, attempt the above-mentioned tips to resolve it. These tips require no technical expertise to be performed. Myrepeater.net can be easily accessed after performing the above-mentioned guidelines. |
ArchivesCategories |
 RSS Feed
